
There are a few reasons why you are looking up on ‘Concrete Tray DIY’ and landed upon this article:
- It seems like a cool hobby to pick up in the comfort of your own home.
- You have tried searching for a decent concrete tray online and realised that everything is either too expensive, too small or not the ideal shape.
- It seems to be a fun activity to do with your family.
For me, the reason was definitely point number 2 – It was so difficult to find a decent concrete tray to place my candle and candle accessories on. Everything was either way too expensive or not of the ideal size. Hence, I decided to make my own Concrete Tray DIY and realised that it is really inexpensive and easy to make! In this article, I will share with you a step by step guide on how you can easily make your very own concrete tray.
Concrete Tray DIY – A Step by Step Guide (Video included)
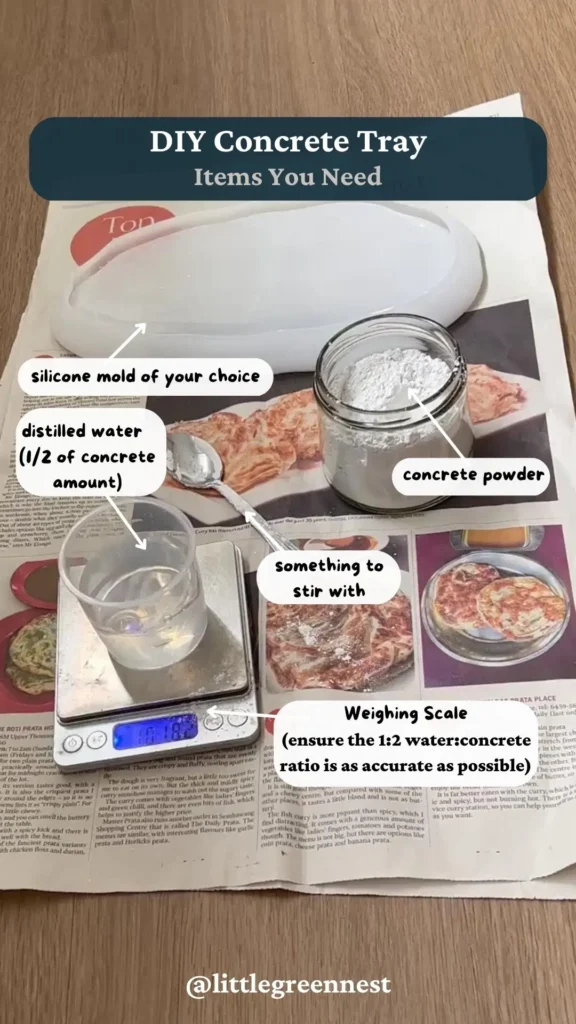
Items you need
- Silicone mold of your choice
- Distilled Water (1/2 of concrete amount)
- Something to stir with (Eg a spoon or chopstick)
- Concrete powder
- Weighing Scale
Directions
Step 1
First, pour water (preferably distilled as this lowers the risks of any microorganisms being inside the water and damaging the concrete diy product) into concrete powder.
Step 2
Mix the water and concrete together until well combined and the consistency is thick and smooth like milkshake.
Step 3
Once the mixture is done, it is now time to pour into the silicone mold of your choice. Pout until the silicone mold is filled to the brim.
Make sure to tap around the base of the concrete tray a few times to get rid of air bubbles. Refer to the video above to see what I mean!
Step 4
Give the concrete tray at least 1 day to Harden. If you are impatient and attempt to remove the concrete tray before 1 day is up, the concrete will not be hardened yet and all your effort would have gone to waste.
Step 5
After >1 day, it is time to remove the concrete tray from the mold! Start with the edges as you slowly peel out the concrete tray from the silicone mold. Again you can refer to the video above to see what I mean!
Step 6
Your concrete tray is complete! Use it as a display piece, to store your frequently used accessories, to house your skincare products and more!
Happy DIYing! We would love to see your concrete creations. Feel free to post your concrete creations on Instagram and/or tiktok and tag #LittlegreennestDIYs so we can have a look!